Showing posts with label Vivid Lacquer. Show all posts

Sunday, December 1, 2013

Vivid Lacquer Winter 2013 Collection

Hello and Welcome!!!

What did you all think about Black Friday? Buy anything nice? Yeahhhh...I was not bold enough to go out and fight the crowds this year. I didn't have such a great experience shopping last year at this time. To many crazy people pushing and shoving ect. The sales are amazing I'm not even going to lie but I just hate crowds.(I love people, Just hate the crowds Ha!) On a much less crowded note I have 3 separate collections by Vivid Lacquer to share with you today. This is the first time I have tried out her lacquer creations and they are gorgeous! This collection along with stamping plates 016 through 023 will be released on December 2nd at 3pm PST except for two of the polishes ("Crimson Vixens" and "Bettie Sage"). Information on those 2 polishes will be posted below. The polish collection is called "Vivid Lacquer Winter 2013". Lets take a look!!!!
For Pricing Click Here
        **Disclosure** I was sent these polishes by Anni of Vivid Lacquer to review and enjoy. 

"Crimson Vixens"
This is a radiant bright red crelly with subtle aqua, copper and is packed with red shimmer. I applied 3 light coats but two coats is enough to get it opaque. This is a beautiful color on any skin tone. A top coat is needed.This polish is apart of the "Pin-Up Collab".This collab is with Jess W of Jess W Photography.This will be available on a partner's site at a later date. As soon as a date for this polish is released I will update you on that info.

"Bettie Sage"
This is a very beautiful true mint crelly with a subtle copper shimmer. I applied 3 coats with a top coat. This color did not apply evenly but with a top coat applied over it you would never know. I recommend a top coat. The top coat really works like magic and will smooth everything together.This color may not be for every skin tone but it is such a gorgeous color.This polish is apart of the "Pin-Up Collab".This collab is with Jess W of Jess W Photography.This will be available on a partner's site at a later date. As soon as a date for this polish is released I will update you on that info.

"The Sea After a Storm"
This is a stunning darkened teal scattered holo filled with gold flakes. This color is similar to the Once More With Feeling polishes. I applied 3 coats and a top coat. This color is very pigmented so 2 coats may be enough it just depends on you what you prefer. I recommend using a base coat. This is apart of the "As You Wish Trio".

^^^^Different Lighting^^^^
"Fire Swamp"
This is a unique murky green jelly packed with red shimmer for a duo-chrome effect. This color was actually hard to capture due to it's shiftiness.This color has a deep lime green shade to it. As you can see above I took photos in different lighting to give you an idea but unfortunately my photos don't do justice for this color LOL. It's truly a unique beautiful shade of green. I applied 3 light coats followed by a top coat. This is also apart of the "As You Wish Trio". 

"Not A Lot of Money in Revenge"
This is a lovely red tinged purple jelly packed with green shimmer for a duo-chrome effect. I applied 3 coats to get it opaque followed by a top coat. This color seems to have more of a light blue or silver shift to it. Gorgeous! This is also apart of the "As You Wish Trio". 

"Murder by Pirates"
This polish I did not review. Anni of Vivid Lacquer wanted to keep this color a surprise for Black Friday and Cyber Monday. This color is a LE and is a black scattered holo. This will be available with purchases over $25 only for Black Friday and Cyber Monday.

"Theoretically Nude"
This is a nude crelly filled with dark flecks and subtle pink shimmer. Reminiscent of a discontinued, hard to find polish.(Borghese Almondine).This color totally surprised me. I had no idea it would look so good with my skin tone being so light. It went with my skin tone perfectly. This is the perfect nude in my opinion. I applied 2 coats to get it opaque followed by a top coat.

Overall this collection is amazing. I love the mixture of colors and all the shimmer packed colors. Remember all of these beauties will debut on December 2nd at 3pm PST with the exception of "Bettie Sage "and "Crimson Vixens".Don't forget to check out Vivid Lacquer's awesome stamping plates. I own a few myself and they stamp perfectly.Which colors caught your eye? Do you own any Vivid Lacquer polishes? Don't forget to follow her Facebook and Instagram for future discounts and giveaways!


Thanks for Reading!!!
Y'all Come Back!!
XOXO


Friday, September 20, 2013

How to use Nail Polish Stamping Templates

Hello And Welcome!!!
I do have to apologize first off for taking so long to write this How To. I have had Strep Throat and I finally went to the doc yesterday. They gave me a Penicillin shot to the bum and gave me some meds. I do feel alot better now and I am so excited to be back. Lets get started!!!!

First off I like to get all my supplies together 
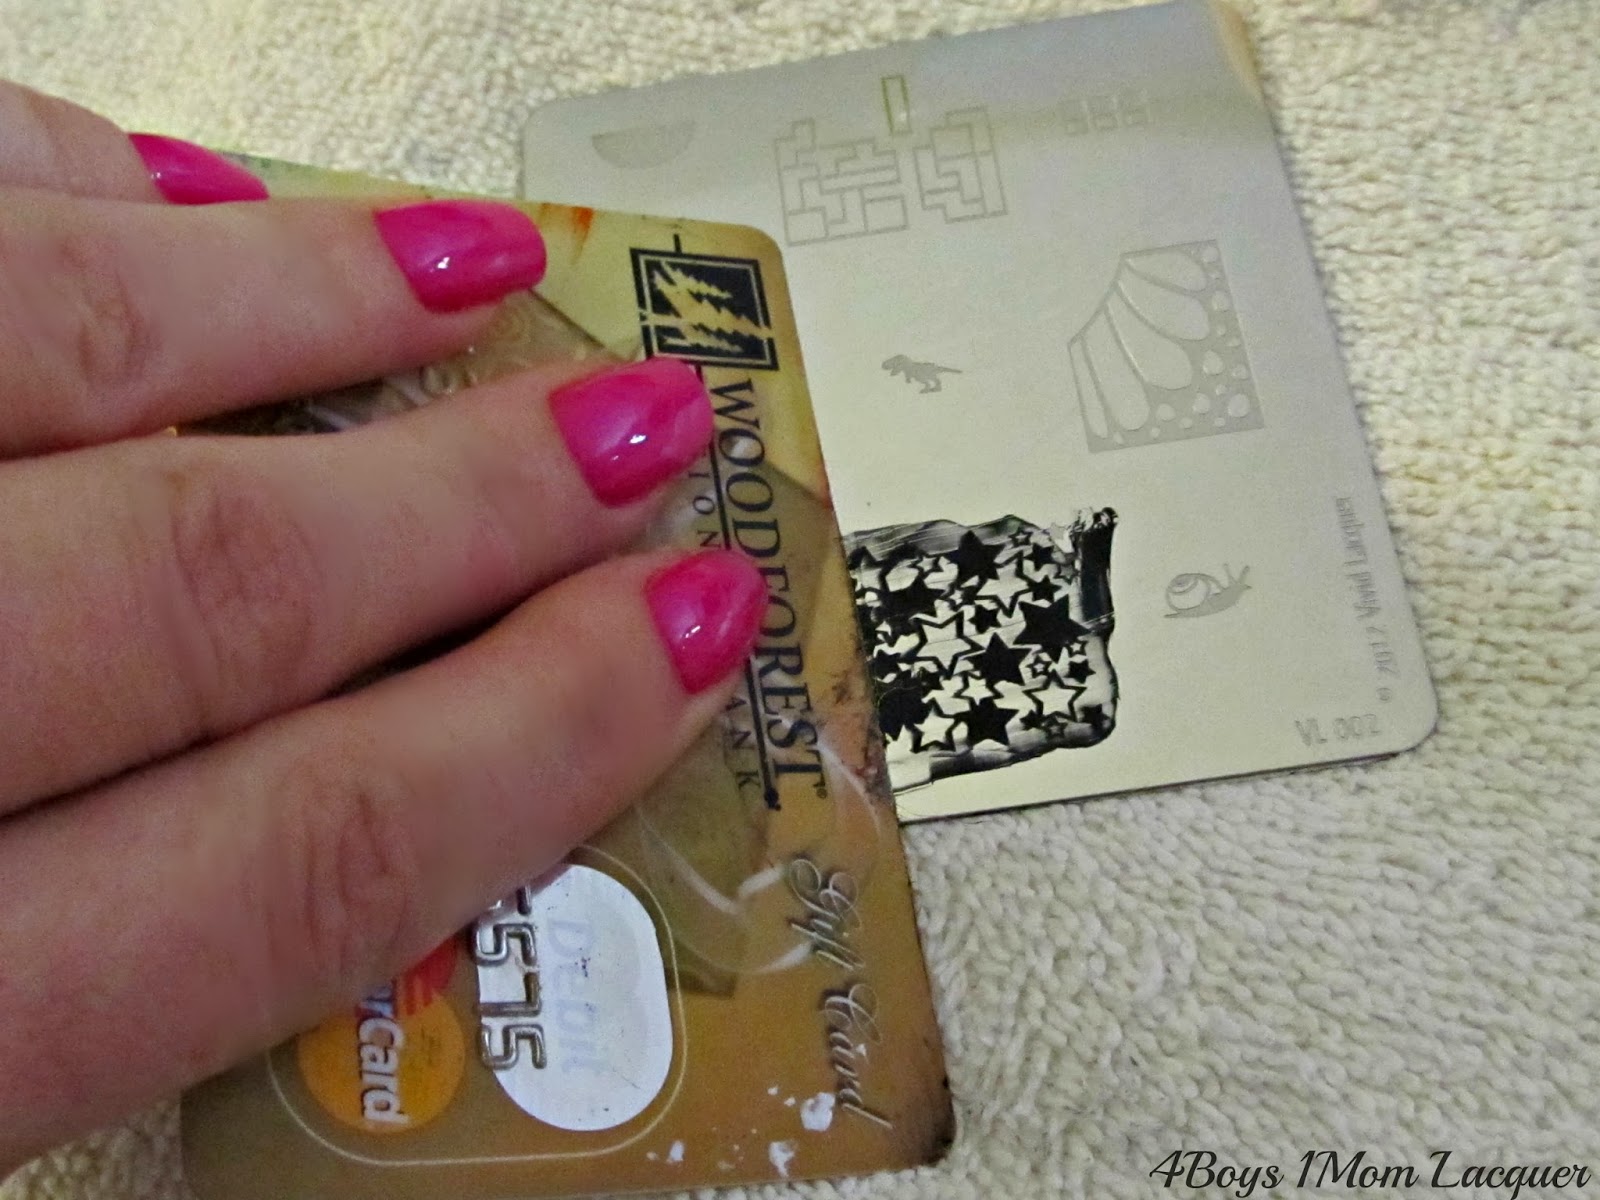
  1. Scrapper/Old Credit or gift card
  2. Angled brushes
  3. XL Stamper
  4. Stamping Template
  5. Bowl of acetone
  6. Old towel or paper towel
  7. Stamping polish
I prefer using an old Credit card because it scrapes much more evenly then the purchased scrapers I have. I also have an XL Stamper which makes applying a full design to your nail bed so much easier and its double ended. I purchased 3 sets of XL stampers for only $5.99 on Ebay HERE.I also use the angled nail art brushes to clean up the polish around my nails. They can be purchased HERE on Amazon for only $2.10 and that is for a whole set. Its a real good deal. I also use an old Ketchup cup to pour acetone in for easier access for cleanups. As for the Stamping Template, I used one that I purchased from Vivid Lacquer HERE. I also recommend purchasing Cheeky plates, they work amazing with all sized nail beds also. You can purchase them on Amazon HERE or purchase them through Cheeky's website HERE. Now lets begin.....

First you need to apply your base color.
I decided to go with China Glaze/Purple Panic
Let that dry. I also like to apply my favorite top coat called 
G&G HK Girl it's a Super Shiny, Fast Drying Top Coat. You can purchase it HERE. It dries super fast and has a very shiny finish.
Now you want to get your plate and apply your stamping polish over the image you want. I used Konad Black stamping polish.
Grab your scrapper/Credit/Gift card and gently scrape the access polish to the side of your towel or paper towel. 
Quickly and gently press your stamper onto the image to pick it up.
Now QUICKLY apply the image to you nails starting from the very side of your nail and gently roll it on. No need to press hard. If you press hard when applying the image you could risk the image separating/ripping.
To clean the access polish off your stamper you can use a cotton ball with acetone or those sticky lint removers.
This is what the finished results will look like before you clean up. Don't worry this is completely normal.This is when your bowl of acetone and your angled nail art brushes come in to save the day. Just dip your brush in the acetone a dab it on your towel and start to clean up around your nail beds.
This is what my brushes look like. My old one on the Left. My new on the right

Your going to want to let that stamping polish dry for a bit before you apply your topcoat. Your topcoat can make it smear.
And now....The Finishing results.....


I hope you enjoyed the step by step process. Its not that bad but practice makes perfect so try and not give up. It becomes alot of fun once you get the hang. I cant wait to see your designs and I hope you share them with me as well. If you have any questions feel free to ask!

Thank you for reading!!!!
Ya'll Come Back!!!
XOXO


Sunday, September 8, 2013

Camo & Guns Nail Art

Hello and Welcome!!!
I did a mani over the weekend and I promised to write about it to show you what I used and where things were purchased. This mani I have done did not take long at all and was very simple. I love Camo and Guns and could not wait to get all my plates delivered to my home so I can create the look. I love to go hunting and go mudding and all that dirty, outdoors stuff. This girl can get down.....lol 
The mani I created is called the Camo & Guns Mani. I posted it on my Facebook page before writing about it. Lets take a look.
To create this look I used......
  • SinfulColors/Beau Khaki
  • Julep/Pippa
  • Mundo de Unas/Peach stamping polish
  • Konad/Black stamping polish
  • Butter London Matte Finish top coat
  • Vivid Lacquer(VL)polish template/010/ $8.00 each
  • Fab Ur Nails polish template/Fun 4/ $18.00 each

What I did first was paint every finger except my ring finger with 1 coat of SinfulColors/Beau Khaki,then using the Vivid Lacquer plate and the camo design I applied the Mundo de Unas/Peach stamping polish and stamped it onto all my nails excluding the ring finger.
For my ring finger I used Julep/Pippa as the base color then using the Fab Ur Nails plate and the gun design I applied Black Konad stamping polish to the plate and used my stamper to apply the gun design onto my nails. Lastly I applied the Butter London Matte Finish Top Coat.
These plates are very good quality and stamped without issue. The images are great quality also.
And That is That!! That is how this awesome mani was created.
I will post the links below on where you can purchase the Nail Polish Templates(Plates).

Fab Ur Nails Plates at Llarowe shop HERE
Fab Ur Nails Order Form HERE
Vivid Lacquer Esty Shop HERE

***Note when ordering Fab Ur Nails plates.... I found it alot cheaper for shipping being in the US to order from Llaroew's shop***

All of the supplies were purchased by me .

Thank you for reading!!
Ya'll Come Back XOXO!!